



About Spot Gloss over Soft Touch Laminate
Gold and silver foil show off a metal. Venus shows off a surface. Spot gloss is a clear sleeking foil: it adds no color of its own, only a selective glossy finish. Laid over a soft touch laminate, it gives you two finishes on one sheet, a velvety matte field and glossy accents that only come alive when the light hits them.
Six layers go into this piece, and each one depends on the last. We start with Explorer Silk 130# Cover and print the CMYK underprint, the artwork that will sit beneath the laminate. The printable soft touch laminate goes on next. Then the laminated sheet goes back through the press for a second round of printing: a layer of white ink, followed by a CMYK overprint for the elements that sit on top of the laminate. Finally the sheet runs through the sleeker, and the spot gloss foil transfers onto the printed areas.
The order isn't a matter of taste. When we combine foil, laminate and print, CMYK can go beneath the laminate, or print as the final layer alongside spot gloss, and in no other combination. Spot gloss has its own rule: it sticks to every other foil, and every other foil sticks to it, so it always goes on last. Venus follows both rules, which is why the artwork is split into an underprint and an overprint rather than printed once.
Hold the poster flat under ordinary light and it reads as a soft, matte print. Tilt it toward a window and the glossy passages step forward from the laminate around them. Run a finger across the sheet and you can feel the change too, from the soft touch of the laminate to the slick of the foil. It's a quieter effect than gold or silver, and that restraint is exactly why we like it.
Why Print Over the Laminate?
If the laminate is going to cover the artwork anyway, why print twice? It's a fair question, and the answer comes down to what spot gloss needs in order to stick, and where it has to sit.
There are three reasons. First, sleeking foil is made with a binding glue that sticks to HP Indigo ElectroInk and not to the bare surface, so the gloss can only land where there is ink beneath it. On Venus, that ink is the overprint. Second, printable laminate takes ink the way a primed colored stock does, and white ink printed first gives the overprinted elements an opaque base so their colors read cleanly on the matte surface. Third, the laminate steadies the sheet. Paper shrinks as the press and the sleeker heat it, and the laminate holds it steady between passes, so the overprint and the foil stay in register with the underprint.
We'll be honest: a two-file job is more work to set up than a single foil pass, and lamination can shift color slightly, so this route needs a printed proof before production. For a piece that should feel as good as it looks, we think the extra pass is worth it.
Best Practices
Design Considerations
- Layer planning: Map out all six layers in your design file before production. Each layer serves a specific purpose in the final effect.
- White ink backing: Use white ink strategically under areas that need opacity or to brighten colors printed over the laminate.
- Spot gloss placement: Apply spot gloss to areas where you want visual emphasis. The transparent glossy finish creates highlights against the matte laminate.
- Choose bold over fine: Like any sleeking foil, spot gloss picks up most reliably on bold shapes. Keep lines at least 1pt thick, and avoid thin, script and small fonts.
File Setup Essentials
-
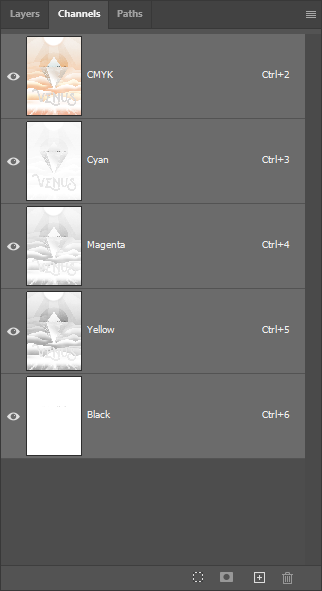
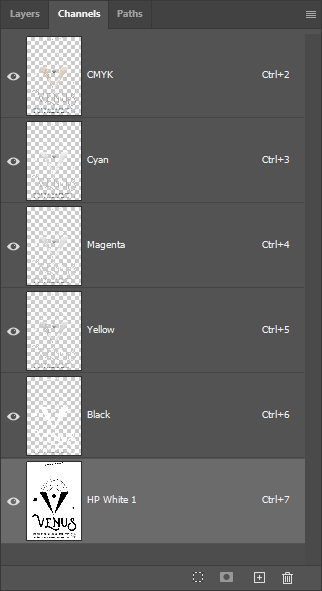
Split the artwork into two files: The underprint file holds the CMYK that
prints beneath the laminate. The overprint file holds the elements that print on top of
it, with their
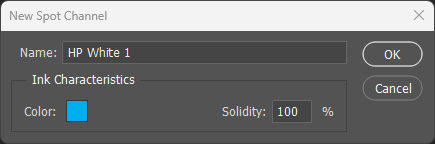
HP White 1backing. -
Name the gloss separation exactly: Set every spot gloss element to a spot
color named
HP Gloss(case-sensitive), placed over theHP White 1layer. Convert all fonts to outlines. - Spot gloss goes last: Spot gloss sticks to every other foil and every other foil sticks to it, so it must be the final layer applied in any project.
Substrate & Finish
- Use printable laminate: Standard laminate won't accept overprinting. Ensure you specify printable soft touch laminate for this technique.
- Coated stocks only: Printable laminate goes over a silk or gloss coated stock, like the Explorer Silk used here.
- Plan for a printed proof: Lamination can shift color, and a job with a separate CMYK underprint file needs a printed proof before production.